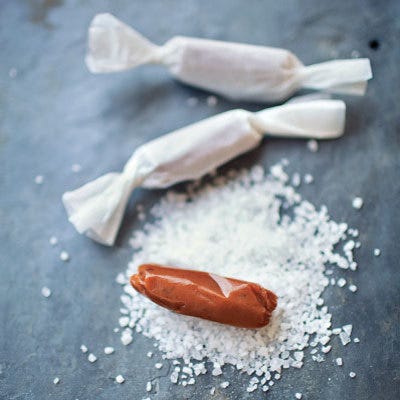
Sea Salt Caramels
Delish editors handpick every product we feature. We may earn commission from the links on this page.
Yields:
1
Liddabit Sweets never planned on doing a sea salt caramel. Well, one messed-up batch of Snacker caramel sprinkled with salt, and they changed their tune. The Sea Salt Caramel has since become their best seller.
From: The Liddabit Sweets Candy Cookbook © 2013 by Liz Gutman and Jen King Buy the book
Advertisement - Continue Reading Below
Ingredients
- 3 1/2 Tbsp. unsalted butter
- 1 3/4 cups granulated sugar
- 1 1/2 cups evaporated milk
- cup heavy (whipping) cream
- 1 vanilla bean
- 3/4 cup light corn syrup
- 1 Tbsp. light corn syrup
- 1 Tbsp. coarse sea salt
- Cooking spray or vegetable oil
Directions
- Step 1Grease the baking sheet with the 1 teaspoon butter, and set it aside on a heatproof surface.
- Step 2Combine the sugar, evaporated milk, heavy cream, and vanilla bean and seeds (if using) in a large (6- to 8-quart) saucepan. Bring to a boil over medium-high heat, uncovered and without stirring.
- Step 3Once the mixture has come to a boil, insert the candy thermometer. Add the light corn syrup, and stir gently with the spatula until everything is mixed well. Reduce the heat to medium-low and cook, stirring often and making sure to scrape the bottom of the pot to keep the mixture from burning, until the mixture reaches 230 degrees F (thread stage), about 30 minutes.
- Step 4Add the 3 1/2 tablespoons butter. If you used a vanilla bean, fish it out with a slotted spoon. Stirring continuously, cook the caramel until it reaches 241 degrees F (soft-to-firm ball stage), 15 to 20 minutes; it will be a deep tawny color and have slow, rolling bubbles in the center. Remove it from the heat.
- Step 5Stir in the salt and vanilla paste or extract (if using), making sure they’re distributed evenly. Put on oven mitts and carefully pour the caramel onto the prepared baking sheet. Allow it to cool completely until it’s firm to the touch, at least 3 hours, preferably overnight. (If it’s humid, cover the caramel tightly with plastic wrap and store it at cool room temperature until you can cut and wrap it in wax paper.)
- Step 6Lightly oil a sharp chef’s knife with cooking spray, and run the tip around the edge of the baking sheet to release the caramel. Gently turn the caramel out onto the lined cutting board, and cut it into 1-inch squares. Wrap the pieces in wax twisting paper (to turn the squares into little logs, fold each piece over on itself, wrap the twisting paper around it and roll the wrapped caramel against the cutting board, then twist the ends of the paper shut).
- Step 7Store the caramels in an airtight container, at cool room temperature for up to 4 weeks; they’ll last for up to 3 months in the refrigerator.
Advertisement - Continue Reading Below
Advertisement - Continue Reading Below
Advertisement - Continue Reading Below


