Made This?
Let me know how it went in the comments below.

Hear me out: making ice cream at home does admittedly take a bit of effort, but the payoff is TOTALLY worth it. With only 6 (staple) ingredients and a bit of patience, you’ll have homemade vanilla ice cream ready for all of your favorite toppings. Whether you’re looking to cool off on a summer’s day or need a homemade birthday dessert, keep reading on for all of my tips and tricks to making the perfect scoop below.
First, we'll create our ice cream base. In a large bowl, beat together your sugar and egg yolks until you've created a mixture that is a light yellow color, and that has thickened slightly. You can also use a whisk, though you may have to work a bit harder at it. This should take 3-4 minutes, but keep going until you notice the two key signs.
Next, we'll add the heavy cream and whole milk. Again, either by hand with a whisk or with an electric mixer, combine everything together until no traces of yolk remain in the mixture.
Now we're going to cook our mixture on medium-low heat. Since the custard base contains eggs, you're gonna want to be very careful not to cook them, or else you'll be left with some very creamy scrambled eggs. Keep a close eye on your custard and stir it frequently with a wooden spoon, making sure the mixture never comes up to a simmer. To test if the mixture is cooked, coat the back of your spoon with ice cream base and then swipe your finger through the center. If the streak you wiped away fills in with custard mixture, it needs more time. If there's a distinct line through, then it means your custard is thick enough and you're good to go! If you want to take the guess-work out of this step, you can also use a candy thermometer to read the temperature of your custard. When it hits 170° to 175° F, it's ready to take off the heat.
Once your custard is perfectly thick, remove it from the heat, and add in the vanilla and salt. Strain your custard into a large bowl or container, cover and let it chill in the fridge. I recommend chilling for at least 3 hours, but you can go up to overnight. Give yourself plenty of time for this—you don't want to rush your ice cream and end up with a melty mess.
Once your custard is frozen and your ice cream maker bowl is frozen (more on that below), add your custard to the ice cream maker and churn according to the instructions.
When the ice cream appears to look like soft serve, transfer it to another container and freeze until fully hardened. Again, you can do this for just 2-3 hours, but if you want to guarantee it sets, overnight is ideal.
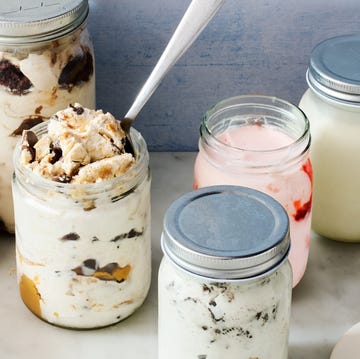
This ice cream is the perfect base for pretty much any flavor. The easiest way to integrate mix-ins (I'm talking crushed cookies, strawberry jam, chopped Reese's, etc.) is to fold them into the churned soft-serve style ice cream that comes out of your ice cream maker, before it goes into the loaf pan. (BTW, if you prefer soft serve, you can eat it right out of the ice cream maker!) If you're looking to flavor the base of the ice cream (like in our favorite chocolate ice cream, blueberry ice cream, peppermint ice cream...), you'll need to add those flavorings to the custard before you cook it.
sugar
egg yolks
heavy cream
whole milk
pure vanilla extract
salt
Let me know how it went in the comments below.

Mason Jar Ice Cream

15 Editor-Approved No-Bake Desserts

39 Best Summer Pie Recipes

5 Ways To Upgrade Your Boxed Brownies